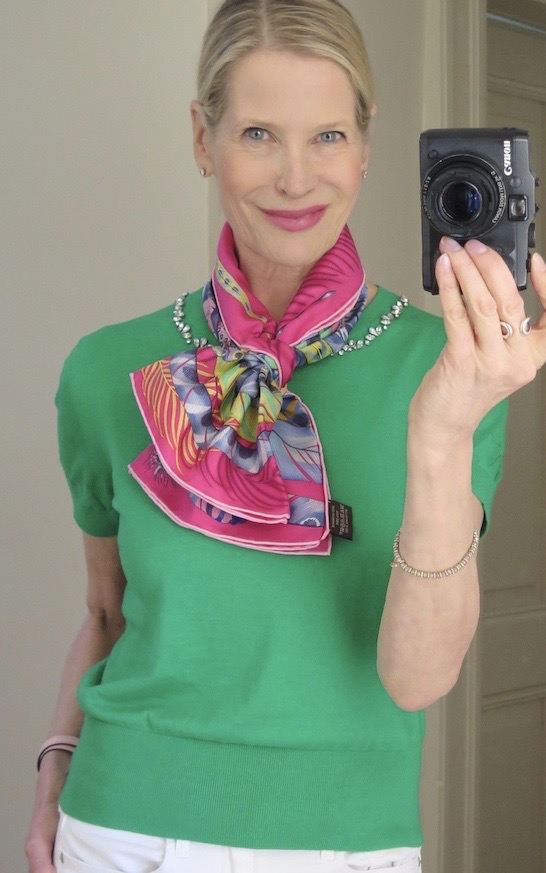
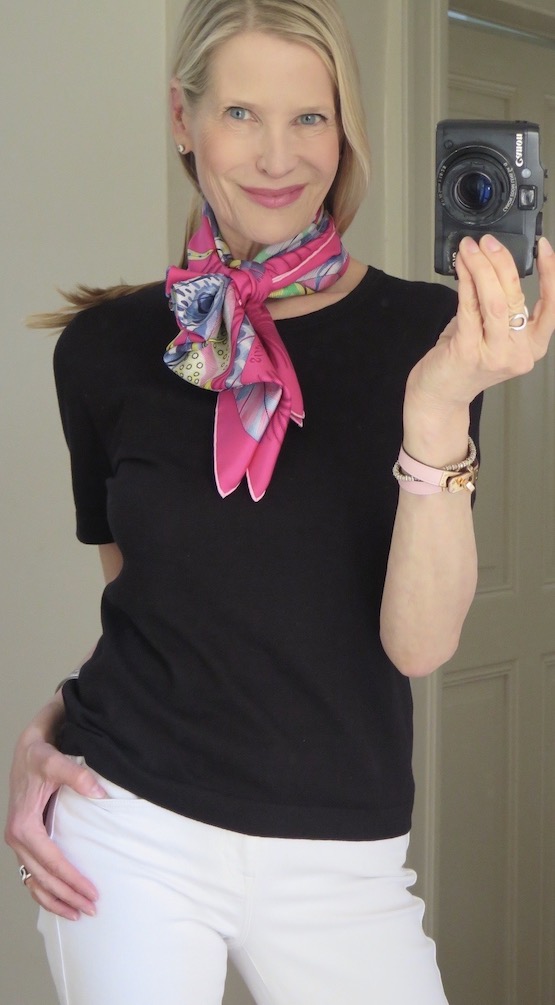
Tutorial:
If the video doesn't show in your email subscription, please click here to see it on YouTube
About:
The Palmier transforms your scarf into a pair of "leaves," resting gracefully upon one another. The silk flows with elegance and simplicity through a Classique scarf ring, which holds the Palmier securely in place all day long.
What it highlights:
The Palmier's "leaves" showcase the border and hem of the rectangular starting point. Depending on how you fold your scarf before placing it around your neck, the highlighted part can be towards the center of your scarf or feature the corner and bottom part (further details in tip #4 below).
On Instagram:
With a 90 scarf:
Tips #1 - #6
The Palmier is easy and straightforward to tie, and yet the end results can be subtly different every time. I am, therefore, including an extensive tip section that explains the nuances and lets you achieve the exact results you wish to create. However, for those who prefer not to dive too deeply into this, there is no need to . . . you can simply enjoy the knot and let yourself be surprised by the slightly different results.
Tip #1 - LEAVES
To achieve a smooth bottom "leaf," place your scarf around your shoulders as shown in the tutorial.
Then identify the "flat" side, opposite the one that has a fold (indicated by the pink arrows):
Slide your scarf ring up on the flat side :
Instead, if you slide the scarf ring up the side with the fold (as highlighted with the pink arrows above), the bottom end would end up with a fold, too:
Tip #2 - LEAF SHAPE
Depending on how close you wear the Palmier to your neck, the "leaves" will be either diamond, square, or triangle-shaped.
This is how the knot is shown in the tutorial: the ends form a diamond-shape, resembling overlapping leaves:
If you pull the Palmier closer to the neck, the ends become longer and, therefore, broader and squarer:
When pulled even closer to the neck, the shape evolves into overlapping triangles:
Tip #3 - BORDERS
The Palmier works best with scarves that don't have wide, solid-colored borders, as these result in empty, color-blocked "leaves" that lack in detail.
The best results are achieved with designs that continue all the way down to the hem,
or with scarves that have detailed or elaborate borders.
The Palmier is also perfect to showcase contrasting hems:
A scarf that has a solid border produces empty ends lacking in detail:
Tip #4 - CHOOSE WHICH PART TO HIGHLIGHT
You can choose whether you want the ends to highlight your scarf's borders or corners:
I. Highlighting the borders towards the center
When you place your scarf around your neck, make sure that the "flat side" (i.e. the "scarf ring side") shows the border:
Then proceed as shown in the tutorial,
The result shows aligned borders:
II. Highlighting the corners
Place your scarf around your neck and make sure that the "flat" side (i.e. "scarf ring side") shows one of the corners.
Then fold the opposite side over and proceed as shown in the tutorial.
As a result, both corners are featured:

TIP #5 - DIRECTION
If you want the Palmier to point towards your right shoulder,
start the diagonal fold with the top right corner:
If you want the Palmier to point towards your left shoulder, start the diagonal fold with the top left corner.
TIP #6 - HEMS
You might have noticed that in the above pictures the hems can be in different positions, sometimes they frame the entire "leaf", and sometimes just the bottom part. This depends on how you fold the scarf before you place it around your neck. These are small alterations to the appearance, but once you start noticing them, you'd probably want to know how to achieve them. You can experiment with eight possible ways to make your initial fold:
1. and 2.: Place your scarf in front of you so that the hems are facing upwards.
1. Start the diagonal fold with the top right corner.
2. Start the diagonal fold with the top left corner.
3. and 4.: Place your scarf in front of you so that the hems are facing downwards.
3. Start the diagonal fold with the top right corner.
4. Start the diagonal fold with the top left corner.

You can then turn your scarf around and repeat with the other side for a total of eight different starting points and outcomes:
VARIATIONS:
You can wear the Palmier close to your neck or further away; twist the top end up or down; make one "leaf" smaller than the other or keep them the same size. Here are a few of the many possibilities:
Keeping both ends the same length so that the borders and hems form a continuous line:
Leaving the top end shorter for a tiered effect:
As above, but closer to the neck and with longer ends:
In other scarf formats:
With a 70 Vintage Silk: